US$25.90
استعراضات العملاء
- كل المراجعات (515)
- صورة (65)
- فيديو (7)
الترتيب حسب:
المراجعات من بلدك فقط (Jordan)
|
إظهار النسخة الأصلية
تمت ترجمة جزء من المراجعة تلقائيًا.
-
 JRichardVIP2AU28/09/2020
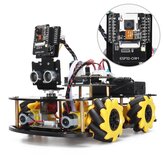
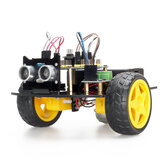
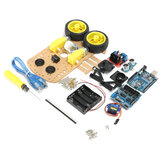
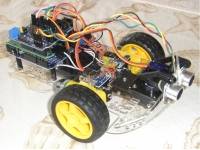
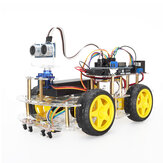
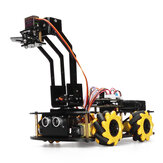
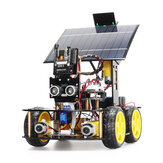
هذه مجموعة مثيرة للاهتمام، ولكنها غير مكتملة وبعض الأجزاء غير صحيحة. يتم قطع الشاسيه لمشروع مختلف، ولا تحتوي على نقاط التثبيت الصحيحة للوحة التحكم أو المستشعر، لذا يلزم حفر إضافي. التعليمات غير كاملة - على سبيل المثال لا توجد إشارة على الإطلاق إلى مجموعة المستشعر، وهي معقدة جداً. لا يوجد تخطيط أسلاك، لذا يلزم معرفة جيدة بالإضافات Ardino وترتيبات الإمداد بالطاقة. هناك 4 مواقف مزوّدة، لكن يجب أن يكون هناك 12. يلزم وجود بعض اللحام، فضلاً عن أدوات إضافية. لا تتضمن موصلات Dupont. على الجانب الإيجابي، يكون تركيب المستشعر مائلاً ولوحة للكاميرا، ويمكن ترقيته مع بعض الإضافات المتوفرة بسهولة. الخروع لديه كرات يتضمن درع المستشعر رؤوس لعدد من المكونات الإضافية، بما في ذلك شاشة LCD وبطاقة SD والبلوتوث (ولكن لاحظ أن Arduino قد لا يدعم جميع الوظائف في وقت واحد). يتم توفير عجلات الترميز، ولكن للحصول على معلومات عن عدد الخطوات لكل عجلة (على سبيل المثال، لضمان التتبع المستقيم) ستحتاج إلى إضافة أجهزة الاستشعار البصرية وإنشاء الرمز المطلوب. توجد قطع على اللوح لتثبيت أجهزة الاستشعار. هذا روبوت بسيط يُعد أساساً جيداً للتحكم في الروبوتات المعتمدة على أردينو، ولكن كن مستعداً للتعامل مع المشاكل المذكورة أعلاه.
تعليقات (1)إظهار النسخة الأصلية -
 lynncoVIP3US15/04/2019
Fun to build and works great. I built this kit as a working obstacle-avoidance robot car. Provided my own wires, standoffs, and some additional hardware. Also had to drill some additional mounting holes. I switched to using five AA batteries to get better voltage regulation.
تعليقاتإظهار النسخة الأصلية -
 obiremiVIP1FR29/04/2018
I just bought 2 of those kit. 1 for me and 1 for my 11 years old daughter. With the help of the video of ChenTheDesignMeker you could easyly assemble and program the robot. Don't forget to by some dupont wire like those to connect the L298N and the ultrasonic sensor to the arduino. https://www.banggood.com/search/1262667.html https://www.youtube.com/watch?v=eKcKdMb_nkQ&list=PLN9tittQZUlRJCdE17eORJ7ZGVhGnH77k I just make some change from the video: Ultrasonic sensor ECHO=>D12 TRIG=>D13 VCC=>VCC GND=>GND L298N ENA=>D11 IN1=>D9 IN2=>D8 IN3=>D7 IN4=>D6 ENB=>D5 Servo =>D4 Thanks to Banggood for this great kit and thanks to Chen for his video.
تعليقات (1)إظهار النسخة الأصلية -
friedlcVIP3US14/11/2017
No manual included, so I made a video here: https://youtu.be/eKcKdMb_nkQ Hope this can help you!
تعليقاتإظهار النسخة الأصلية -
 19/07/2017
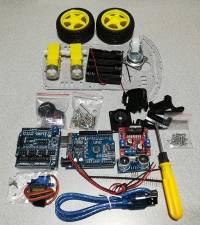
Bei dem Bausatz handelt es sich um eine großartige Zusammenstellung von Bauteilen für Roboterexperimente. Das Preis Leistungsverhältnis ist ausgezeichnet. Man erhält für den Preis unter anderem ein Arduine, ein Shield, eine Ultraschallsen sor und eine L298N Motosteuerung. dazu viel weitere Einzelteile. Super. Ich habe eine Youtube Serie über den Bau mit diesm Kit gemacht. Hier die Playlist. https://www.youtube.com/playlist?list=PLkjRsJrnsLo-crR1Euqro47uhaJg5Ci_K -------------------------------- The kit is a great combination of components for robot experiments. The price performance ratio is excellent. The price includes an Arduine, a shield, an ultrasonic sensor and an L298N motor control unit. Plus many other items. Great. I have made a Youtube series about building with this kit. Here is the playlist. https://www.youtube.com/playlist?list=PLkjRsJrnsLo-crR1Euqro47uhaJg5Ci_K
تعليقاتإظهار النسخة الأصلية -
04/09/2018
Han venido todos lo componentes. No viene con libro de instrucciones, tienes que pensar cómo montarlo. Es un kit DIY total, toda la programación la realizas desde 0. Muy recomendable para principiantes.
تعليقاتإظهار النسخة الأصلية -
obiremiVIP1FR19/05/2018
A very cheap but complete kit to learn robotic on arduino even for children. It come with all necessary item except female to female dupont cable to connect arduino shield to L298 board and ultrasonic sensor. Don't forget to buy some https://www.banggood.com/search/75612.html You can find assembling and programming tutorials on my website: www.obiremi.ovh
تعليقاتإظهار النسخة الأصلية -
AredeVIP3PT17/04/2018
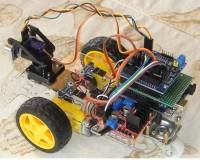
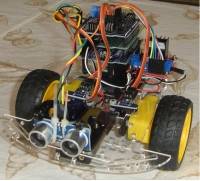
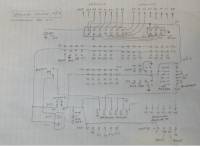
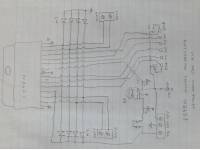
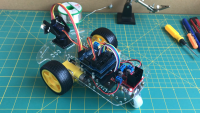
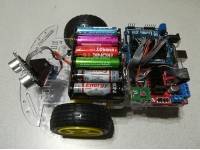
Produto interessante, em especial o preço, para a quantidade de material que tem. Faltam instruções detalhadas de montagem. O que vem só mostra a montagem dos motores. Não há nada sobre a montagem dos restantes componentes nem o esquema de ligações. Para quem não tiver conhecimentos de eletrónica fica complicado. Vejam os comentários já existentes. Felizmente alguém já colocou na net o esquema de ligações e um programa para o Arduino. Muito obrigado. Também quero contribuir para o vosso êxito na montagem. Por isso deixo uma foto do meu já montado e do esquema de ligações (alterado). Fiz um suporte diferente para a placa de ultra-sons (não gostei do que vinha) e tive de colocar 6 pilhas porque com 4 não funciona - o driver dos motores é alimentado com 6 volts e o total dos 9 volts vão alimentar a entrada DC do Arduino. A saída de 5 volts do driver dos motores não é suficiente para o Arduino funcionar corretamente. O programa que encontrei (e que não consigo deixar aqui)funciona bem, mas fiz alguns melhoramentos e o veículo passou a ter um pouco mais de inteligência. Boa sorte!
تعليقات (1)إظهار النسخة الأصلية -
10/12/2017
I like this package it's complete. I recommend for my students
تعليقاتإظهار النسخة الأصلية -
23/06/2018
My first kit came crushed so they sent me a new kit that was all in one piece. The anticipation was killer. The kit went together with just a few hiccups trying to find the correct holes for everything is impossible so you must improvise. The M3 stand-offs that Banggood sells are good for this. Just screw them into the board in all four corners and and screw them into the platform where ever you can then you can use the stand-offs as guides for where you need to drill holes. Second you
تعليقات (2)إظهار النسخة الأصلية


Show:
قد تكون مهتمة ايضا بـ
-
 US$49.85
 -
US$36.99
-
US$6.99
-
US$92.21
-
US$7.99
-
US$73.99
-
US$12.99
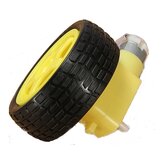
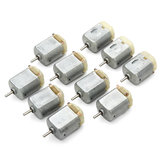
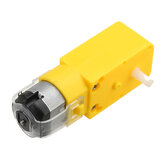
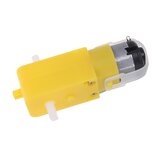
محرك تروس مخفضة محور واحد DC 3V-6V (10 قطع) لسيارة الروبوت الذكية المصنوعة بواسطة الهواة
-
US$1.85
محرك تخفيض السرعة لمحور واحد بجهد 3-6 فولت للسيارات الذكية المصنوعة يدويًا
-
US$7.53
-
US$26.99
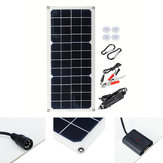
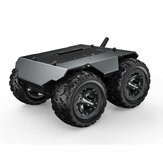
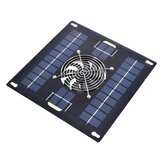
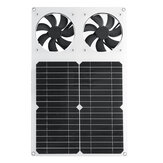
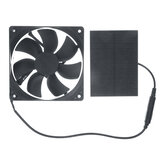
لوح شمسي كبير 12 وات 18 فولت مروحة مستقيمة لتنقية الهواء بطاقة عالية
-
US$7.59
5 قطع DC3V-6V محرك تروس محور واحد لسيارة الروبوت الذكية للقيام بأعمالها يدويًا
-
US$19.99
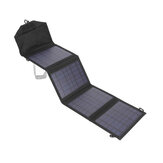
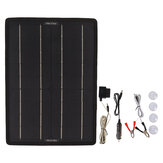
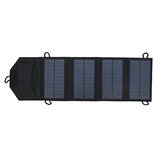
لوح شمسي محمول قابل للطي بقوة 10 واط من البوليسيليكون للاستخدام الخارجي
-
US$198.59
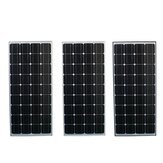
Elfeland® SP-100W 12V 1200x540x30mm لوح شمسي قوة 100 واط بكبل طوله 5 أمتار
-
US$42.00
-
US$10.99
-
US$48.59
-
US$5.69
محرك تروس محوري مزدوج DC 3V-6V TT Motor لسيارة الشاسيه الذكية روبوت، محرك سرعة أسفل
-
US$15.99
-
US$23.99
-
US$28.99
-
US$22.99
-
US$5.99
-
US$6.99
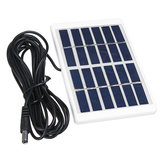
لوحة شمسية محمولة بوليكريستالينية صغيرة 1.2W 6V بإطار بلاستيكي + كابل واجهة تيار مستمر 5521
-
US$10.99
-
US$8.49
-
US$49.99
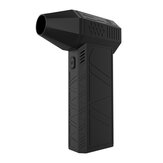
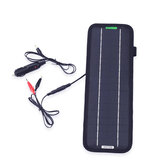
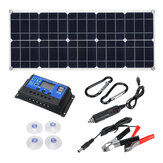
لوحة شمسية بقوة 30 وات وجهاز شحن USB ثنائي 12 فولت / 5 فولت بجهاز تحكم شمسي 10 أمبير وكابلات
-
US$7.99
-
US$7.19
-
US$6.56
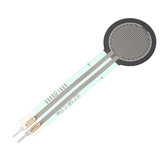
FSR402 مقاومة حساسة للقوة قطرها 0.5 بوصة وحدة استشعار الضغط FSR للقيام بعملية التركيب بنفسك
-
US$5.99
-
US$8.99
وحدة استشعار صوت ميكروفون حساس عالية الإخراج التناظرية لاكتشاف مستوى الصوت إلكتروني بناء الكتلة
-
US$8.59
محرك تروس محوري مزدوج DC 3V-6V TT محرك لسيارة الروبوت شاسيه ذكي ، خمس قطع
-
US$5.99
-
US$9.28
-
US$7.59
3Pcs DC 3V-6V محرك تروس محوري مزدوج لسيارة شاسيه ذكي روبوت محرك بخاري سرعة
-
US$7.99
-
US$24.99
-
US$23.99
-
US$10.99
-
US$5.59
وحدة مستشعر حركة الجسم البشري بالأشعة تحت الحمراء Mini IR Pyroelectric Infrared PIR
-
US$9.99
-
US$19.99


recommendation for you
-
US$16.40
-
US$19.99
-
US$52.99
-
US$36.99
-
US$17.99
-
US$17.99
-
US$106.99
-
US$33.99
-
US$69.99
-
US$8.99
-
US$46.19
-
US$20.69
-
US$15.99
-
US$35.99
-
US$26.16
-
US$28.99
-
US$28.99
-
US$19.99